
 How to Assemble Flat Pack Furniture Without Damaging It
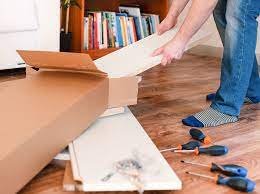
Clear your workspace before opening the box. A clutter-free area prevents lost parts and accidental scratches. Lay down a soft blanket or cardboard to protect the furniture and floor. Keep small components in labeled containers to avoid confusion later.
Check the manual first, even if you’re confident. Manufacturers often include model-specific tips or warnings. Missing a step can lead to misaligned parts or stripped screws. Verify all pieces against the inventory list–contact customer support immediately if anything’s missing.
Use the right tools for each step. A rubber mallet prevents dents when tapping joints into place. Hand-tighten screws first, then finish with a screwdriver at low torque. Forcing parts risks splits in particleboard or stripped threading.
Align panels carefully before securing them. Rushing causes uneven gaps or stress on fasteners. If something doesn’t fit, double-check the diagram–most assembly errors happen from reversed components. Adjust as needed instead of pushing harder.
Protect surfaces during assembly. Place towels under corners when flipping pieces. Peel adhesive backings slowly to avoid bubbles in veneers. If a scratch happens, touch-up markers in matching finishes hide minor damage.
Key preparation steps
Clear a workspace twice the size of your furniture to avoid knocking parts against walls or other objects. A carpet-free, hard floor prevents small pieces from getting lost.
Gather the right tools
Check the manual for required tools–most flat packs need a Phillips screwdriver, rubber mallet, and hex key. Keep a small container nearby to hold screws and fittings so they don’t roll away.
Inspect all parts
Lay out every component and compare them to the inventory list in the instructions. Look for scratches, dents, or missing pre-drilled holes before starting–contact the manufacturer immediately if anything is damaged.
Sort identical screws and bolts into separate piles. Group similar panels together with labels like "shelf A" or "leg B" to avoid confusion during assembly.
Wear gloves to protect your hands from sharp edges and splinters, especially with particleboard or MDF furniture. Keep a soft cloth handy to wipe away dust or fingerprints as you work.
Following the manual properly
Check the manual before touching any parts. Missing a step early can cause mistakes later. Lay out all pieces and confirm each matches the inventory list.
Read step by step
Follow instructions in order–don’t skip ahead. Some steps rely on earlier assembly. If something seems unclear, check diagrams or online guides from the manufacturer.
Use the right tools for each task. If the manual specifies a hex key, avoid substituting a screwdriver. Wrong tools can strip screws or crack panels.
Watch for warnings
Look for bold or highlighted notes in the manual. These often warn against common errors, like overtightening screws or attaching parts backward.
Double-check alignment before securing connections. A misaligned shelf or drawer rail can warp the frame. Test-fit pieces without fasteners first.
If a step feels confusing, pause and reassess. Rushing increases the risk of damage. Most manuals include troubleshooting tips for tricky sections.
Handling particle board and MDF
Lift particle board and MDF panels carefully–these materials chip easily if bumped against hard surfaces. Support large pieces from underneath to prevent bending, which can weaken joints or cause cracks.
Store sheets flat on a clean, dry surface before assembly. Moisture warps MDF, so avoid damp areas like basements or garages. If working in a humid space, seal exposed edges with wood glue or primer to reduce swelling.
Pre-drill screw holes near edges to prevent splitting. Use a drill bit slightly smaller than the screw diameter for MDF, and add a drop of carpenter’s glue to reinforce the grip.
Sand cut edges with 120-grit sandpaper to smooth roughness. Wear a dust mask–MDF particles irritate lungs. Wipe surfaces with a damp cloth before painting to remove dust.
Place furniture pads under legs or corners after assembly. Particle board crushes under heavy weight over time, so distribute pressure evenly.
Tips for tight spaces
Clear the area before assembling to avoid knocking into walls or furniture. Move any obstacles at least 3 feet away from your workspace.
Optimize your setup
- Lay down a soft blanket or cardboard to protect floors and furniture parts.
- Use a folding workbench or two sturdy sawhorses with a plywood sheet as a temporary workspace.
- Keep tools in a small caddy or apron pockets to prevent clutter.
Assemble large pieces vertically instead of horizontally. For example, stand bookshelves upright to attach shelves rather than building them flat on the floor.
Smart tool choices
- Use a compact electric screwdriver instead of a full-sized drill for better control.
- Opt for a stubby screwdriver (under 6 inches) when working in corners.
- Magnetic wristbands keep screws and small parts accessible without taking up space.
Build in sections when possible. Complete drawer units or cabinet boxes separately, then connect them in the final position.
- Label parts with masking tape if you need to disassemble sections temporarily.
- Slide cardboard under partially assembled furniture to move it without scratching floors.
What to do if something goes wrong
Stop immediately if you notice a misaligned part or stripped screw. Forcing pieces together can crack the material or damage fittings. Check the instructions again to confirm the correct assembly order.
If a screw won’t tighten, remove it and inspect the hole. Wooden dowels or chipboard threads may be stripped. Insert a toothpick or matchstick coated in wood glue into the hole, let it dry, then reinsert the screw for a tighter hold.
Replace missing or damaged hardware with spare parts from similar furniture or a local hardware store. Bring the original screw or bracket to match thread size and length.
For cracked panels, apply wood glue along the split, clamp it tightly, and wipe excess glue with a damp cloth. Wait 24 hours before reassembling.
If drawers or doors stick, loosen the screws slightly, adjust alignment, then retighten. Rub a candle or soap along sliding edges to reduce friction.
Contact the manufacturer if parts are defective or missing. Most companies provide replacements free of charge if you supply the product code and photos of the issue.
Keep leftover hardware in a labeled bag for future adjustments or repairs. Store assembly instructions in the same place for quick reference.
FAQ:
What tools do I need to assemble flat-pack furniture safely?
Most flat-pack furniture requires basic tools like a screwdriver (Phillips or flathead, depending on the hardware), a rubber mallet (to avoid dents), and an Allen key (often included). A cordless drill with a low torque setting can speed up the process, but be careful not to overtighten screws. Sandpaper or a small file helps smooth rough edges.