
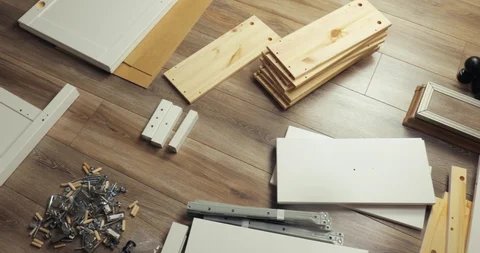
 Kitchen Cabinet Assembly - Top Mistakes to Avoid
Measure twice, cut once–this old rule still holds true. Skipping precise measurements leads to gaps, misaligned doors, and uneven countertops. Always verify wall dimensions, cabinet sizes, and appliance clearances before making any cuts or installations.
Ignoring wall studs is another common error. Cabinets must anchor securely to studs for stability. Use a stud finder and mark their locations before drilling. If studs don’t align with your cabinet layout, install sturdy plywood backing to distribute weight evenly.
Rushing through assembly often results in loose joints or missing screws. Follow the manufacturer’s instructions step by step, and double-check each connection. A wobbly cabinet now means headaches later when shelves sag or doors refuse to close properly.
Don’t overlook spacing for hinges and hardware. Misplaced holes weaken doors and drawers. Test-fit hinges before final installation, and use a template if provided. A small mistake here can force you to buy replacement parts or even new cabinet doors.
Leveling is non-negotiable. Uneven cabinets cause doors to swing open or jam. Start with a laser level to mark reference lines, and adjust shims as needed. Take your time–this step ensures everything fits seamlessly.
Not aligning doors properly
Check hinge placement before tightening screws. Misaligned hinges cause doors to sag or stick. Use a level to confirm the cabinet frame is straight–even a slight tilt affects door movement.
Adjust hinges in small increments
Loosen hinge screws slightly and shift the door up or down in 1-2mm steps. Test the swing after each adjustment. For frameless cabinets, use concealed hinges with three-way adjustability (height, depth, and side-to-side).
Leave a 2-3mm gap between doors to prevent rubbing. If gaps are uneven, adjust the hinge depth until spacing looks consistent. Soft-close hinges need extra precision–misalignment can disable the damping mechanism.
Test before final assembly
Open and close doors fully at each adjustment stage. Check for smooth operation without catching. If a door still binds, verify that the cabinet box is square–correct any frame issues before realigning hinges.
Ignoring wall leveling
Check the wall for levelness before installing cabinets. Uneven walls cause gaps, misalignment, and instability in your finished setup.
- Use a 4-foot level or laser level to measure vertical and horizontal surfaces.
- Mark high and low spots with a pencil–shims or filler strips will compensate for gaps.
- If the wall has severe unevenness (more than 1/4 inch over 4 feet), consider sanding bulges or applying joint compound to low areas.
Attach a temporary ledger board to support cabinets during installation. This keeps them straight even if the wall isn’t perfectly level.
- Secure the ledger board at the planned height of the base cabinets.
- Double-check its levelness before mounting any cabinets.
- Remove the board once all cabinets are firmly anchored.
Adjustable cabinet legs or hanging rails provide flexibility for minor wall imperfections. Install them before securing the cabinet boxes.
Forgetting wall anchors
Always use wall anchors when mounting upper cabinets to drywall or plaster. Skipping them risks the entire unit pulling away from the wall, especially when loaded with dishes or cookware.
Choose the right anchor type based on your wall material:
| Wall Type | Recommended Anchor | Weight Capacity |
|---|---|---|
| Drywall | Toggle bolts | 50-100 lbs per anchor |
| Plaster | Molly bolts | 30-50 lbs per anchor |
| Concrete | Concrete screws | 100+ lbs per anchor |
Install anchors at every stud location where possible. For sections without studs, space anchors no more than 16 inches apart. Pre-drill holes slightly smaller than the anchor diameter to ensure a tight fit.
Test each anchor by applying firm downward pressure before hanging the cabinet. If the anchor spins or pulls out, replace it with a larger size or different type. Cabinets holding heavy items like dishes need at least four anchors per linear foot.
For extra security in drywall, use French cleats with anchors along the entire mounting rail. This distributes weight evenly and prevents sagging over time.
Using incorrect hardware
Always match screws, bolts, and brackets to the cabinet manufacturer’s specifications. Using the wrong size or type can strip holes, weaken joints, or cause misalignment. Check the instruction manual for exact hardware requirements before starting.
Self-tapping screws work best for particleboard, while coarse-thread screws provide better grip in solid wood. Avoid drywall screws–they lack the shear strength needed for cabinets and may snap under pressure.
Confirm the screw length doesn’t exceed the combined thickness of the materials being joined. A screw that’s too long can pierce through the cabinet interior or damage finishes. Measure twice, drill once.
Use washers with bolts to distribute pressure evenly and prevent cracking. Nylon washers reduce squeaking in hinges over time. Metal-on-metal contact without insulation leads to noise and wear.
Replace missing or damaged hardware immediately. Mixing old and new fasteners creates uneven tension, causing doors to sag or drawers to stick. Keep spare parts from the original kit for consistency.
Test each connection for stability before final assembly. Loose hardware now means wobbly cabinets later. Tighten all screws fully, but stop before overtightening–this can split wood or warp frames.
Tips from our experienced team
Measure twice, assemble once
Check all cabinet dimensions against your kitchen layout before assembly. Even a 5mm discrepancy can cause alignment issues later. Use a laser level for precision, especially when mounting wall cabinets.
Pre-drill screw holes
Drill pilot holes for all screws to prevent wood splitting, particularly in MDF or particleboard. For standard cabinet materials, use a 3/32" drill bit for #8 screws. This extra step saves time fixing cracked panels later.
Label every part with painter's tape as you unpack. Most cabinet systems have similar-looking components that are easy to mix up. Write both the part number and its location (like "upper left corner") for foolproof identification.
Adjust hinges before final tightening. Leave hinge screws slightly loose until all doors are hung, then align them perfectly with 2mm gaps between doors. This prevents uneven spacing that's harder to fix afterward.
Install drawer slides with spacers. Place 1/4" wood blocks under slides during mounting to ensure consistent clearance. Remove them after securing the slides for perfect drawer alignment every time.
Use cabinet-grade screws, not drywall screws. Their finer threads and sharper tips grip engineered wood better. For load-bearing areas, choose #8 x 1-1/4" screws with at least 3/4" penetration into supporting frames.
FAQ:
Why do my kitchen cabinet doors not close properly after assembly?
Misaligned hinges or uneven cabinet frames are common causes. If the cabinet boxes aren’t level during installation, doors may sag or stick. Check that the base is perfectly flat before mounting hinges. Adjust hinge screws slightly to realign doors—small turns make a big difference. Also, ensure the doors themselves aren’t warped before installation.